Tuesday, September 30, 2025

Deck Day 27

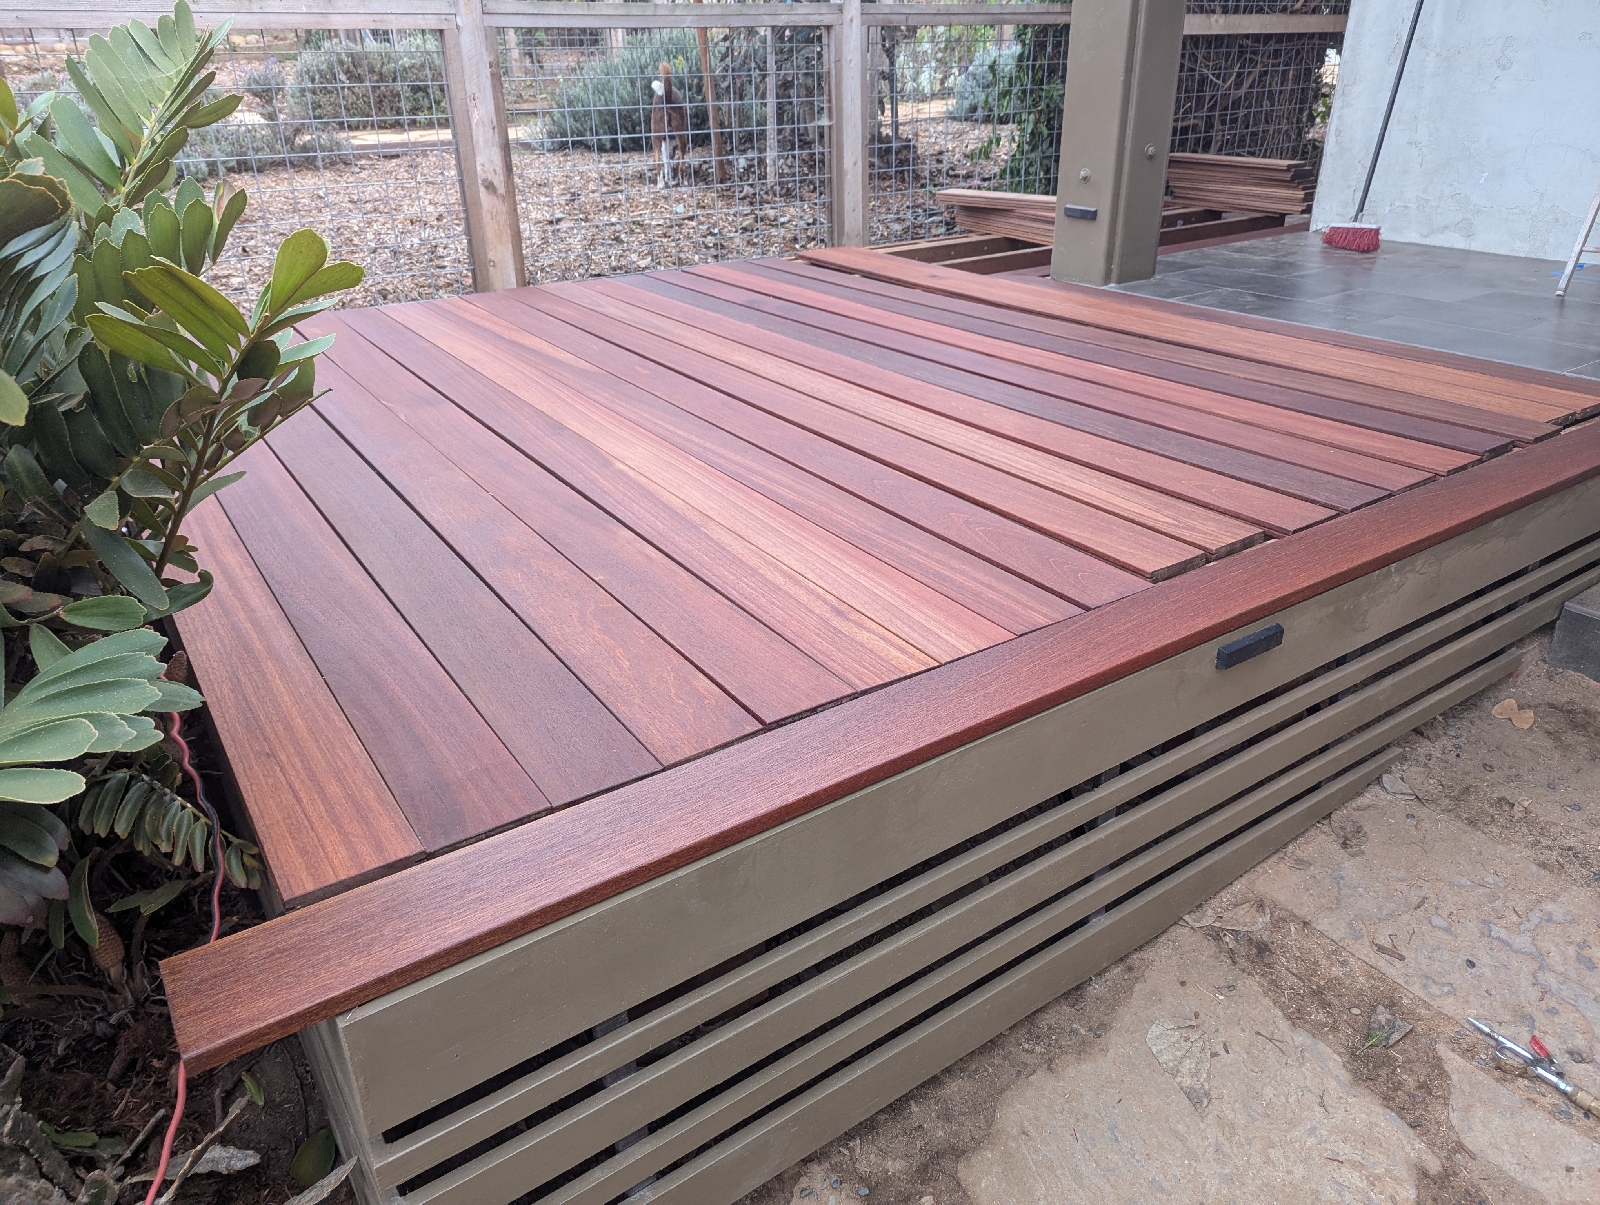
My OCD came out today! This morning we installed the remaining deck boards. After that, we cut, sanded, and boiled two more picture frame boards. These cuts prove to be more difficult than I thought because the angles are no longer exactly 45°. One of them was 45 while the other was 45 and 1/2. The second miter joint was similarly off by a half a degree. Unfortunately my miter saw is not able to cut these angles so I had to manually do it with a carpenter square and a circular saw. It involved up a lot of practice on scrap wood but I was able to get the angles to line up the way they needed for the deck to work right.
After that, I started installing plugs in all of the holes along the picture frame boards that have been installed so far. Due to the irregular nature of the color of the wood, I had to oil each plug one at a time to figure out what color it would be. I ended up placing the bistro table from our backyard on the deck, and putting all of the plugs and tools on top of it for easy access.
Once I found the corresponding hole, I then inserted some glue, rotated the plug so the grain of the wood aligned with the board, and then tapped it in with a hammer. I use a piece of scrap wood to finish off the final couple of taps 
This evening Michelle and I enjoyed the sunset on the deck with diesel!
Tomorrow I plan unsanding each plug and then applying an additionaloil to protect it. As for the deck, we're now down to the last board. I'll give JW lumber a call tomorrow to see where we're at with the custom order. Once we have it, we will cut it, sand it, miter in the remaining corner angles, and install it.

Sunday, September 28, 2025

Deck Day 26

We finally have a deck we can stand on! I would say we are about 2/3 of the way done with finishing the surface of the deck. Here's what we accomplished today....

We started off by finishing up the install of the joist tape. 
After that, we lined up two of the picture frame boards, the one that goes against the porch and the other that goes along the walkway. These boards don't have grooves in them for the clips. Instead, you use a tool to drill a hole in the board. We spaced the holes 3/4 of an inch from the edge of the board and 13 in apart.
the next step was to remove any sawdust or particles from the hold itself prior to installing the screw.
Later on, we will fill the hole with a wooden plug made from the same wood that the deck was created with. It will be almost invisible by the time we are done.

After we had two picture frame boards in, we began to install the fill boards one at a time. Michelle and got it down to routine...install the clips, push the board into the clips, then use a tool that grabbed onto the joists to hold the board tightly in position.
 prior to screwing things down, we would whack the end of the board with a rubber mallet to make sure it was seated tightly against the picture frame board.
 at that point, Michelle held the tool that put pressure on the board and I walked along the board with a screw gun and tightened everything down. The yellow tool fit over the exposed screw and allows me to quickly stick the screw bit into the screw itself. You can tell the people who make these tools are working with craftsmen who do this all day long.
 once all the screws are in, you unloosen the pressure off of the board with the device, and repeat the process.
After about 4 hours, you get something that looks like this....
 So what's next? We need to repeat the same process for the boards going down the side of the house. We have all the boards laid out, but I need to install the rim joists at the far end and do a couple of other minor tweaks before we're ready to get going.
 Tomorrow I am presenting at a wellness conference so we won't be able to get a full day's working. Hopefully by Tuesday we will have all the field boards and picture frame boards installed except for the one long board that goes along the fence. This board is on special order and should be available in the next couple of days. We will need to sand and oil this board prior to install.

After that, the only thing left to do will be to plug the screw holes with the wooden dowels, sand them down, and apply a little bit of oil to help them blend in with the rest of the wood.

If everything goes right, we should be finished with this project by next weekend.

Saturday, September 27, 2025

Deck Day 25

So today started off with a rookie move. We got really excited yesterday and oiled the boards and organized the boards in the pattern we preferred. This morning I woke up and realized we forgot to put the joist tape on. Everything I've read says we need to lay joist tape down on top of the joists to serve as a water membrane between the deck wood. I ended up having to move all of the boards around and apply the tape. That took a while.

While I was at it, I noticed there were some weeds growing up under the deck so I went to Home Depot and purchased some weed abatement cloth. I figured since the boards are out of the way. I might as well cut and install the cloth. 
Maybe I'll need it maybe I won't, who knows but I hope to never look underneath there again.
While I was working on that project, Michelle sanded and oiled the remaining wood that goes along the side of the house. 
Almost all the wood has been sanded and oiled at this point and we're ready to start screwing things down.
Want to know how big our deck is? Here's the dimensions we used when purchasing the weed abatement cloth.

Friday, September 26, 2025

Deck Day 24

We made massive amounts of progress today!

We woke up this morning and decided to cut the 45° angles into the picture frame boards. 
Since I've never done any of this before, I built prototypes using some of our scrap lumber. 
 It looked pretty good so we decided to go for it. We used a speed square to draw the lines and act as a fence for the circular saw.
 Next, one of the picture frame boards needed a notch cut out of it to fit around a drain spout. I had no idea how to do this so I took a break and googled a couple of options. Again, I'm using scrap wood to build prototypes. My first three were disasters.
 finally I figured out how to complete the task. It's a multi-step process.

1. Measure all of your cuts and build a template out of cardboard to test fit.  Draw it out on the board with a pencil but do it on the back side of the wood.

2. Use a circular saw to create multiple cuts into the piece approximately 1/8 an inch apart. Have the cuts stop about a quarter of an inch before where you want the final end cut to be. 

3. Use a chisel to break out all of the small pieces of wood from the cuts. This is the easiest way to quickly remove a lot of wood from the gap.

4. Put your 1/2 in straight router bit into your router and then measure the distance between the end of the bit and the outside guide on the router. Mine is 1 and 3/4 in.

4. Grab a carpenters square and set it on top of where you want the final cuts to be. You're going to use the square as a fence for the router. Add 1 and 3/4 in to all sides of your cut, move the carpenter square as necessary, and clamp it down.

5. Set your router at a quarter inch depth and run it around the hole created during step 2 using the carpenter square as a fence to keep your cut straight. Repeat this process multiple times dropping the bit down a quarter inch each time. After four or five passes, all the material will be removed.

6. Use your 1/8 in rounded router bit to go along the edges of the cut to give them a nice smooth look.

7. Use some sandpaper to sand it down and then apply some wax to the cut to protect the wood.

You end up with this......
I was proud of this cut.

For the rest of the day, Michelle and I sanded every board in the stack. Sanding was a two-step process. I ran across the boards with my old DeWalt orbital sander using 120 grit. Michelle followed me with the new Milwaukee cordless sander that I bought. We had 220 grit on that one and it really gave the wood a nice finish. We sanded all four sides of every board in the main field area as well as the picture frame boards.
After we finished that, we brought out the air compressor and blew down the entire deck because there was sawdust everywhere. We then used a slightly damp cloth to wipe down the tops of the boards to keep them nice and clean. After that,, we applied a protective oil to the deck. The oil is specifically designed for Brazilian hardwood and it provides UV protection to the surface. We applied the oil to all four sides of every board. It took a while but in the end it looks pretty cool.
So what's next? We need to sand and oil the boards going along the side of the house. We'll do that tomorrow. After that, it's time to start the final install process. We hope to start that tomorrow!

Our backs are very sore!

Thursday, September 25, 2025

Deck Day 23

The sawdust was flying today! We cut all of the field boards. Basically we took each board off the deck, placed it on top of the sawhorse, and examined both sides and all edges to look for any damaged ends we couldn't sand out. After that we decided which side of the board we wanted to face up and which end we would cut. Michelle and I use the miter saw to cut each board down to 134 and 3/4 in.
It's starting to look like a deck now! We even put in some of the boards that will eventually form the side of the deck.
 Nothing is screwed down yet 

The next step was to run the router with a 1/8 bit down the ends of the field boards where they butted up next to the picture frame. The router tool is awesome and priceless!
After that, I lifted up the end of each the board s so that Michelle could apply a wax coat to the end to protect the board from cracking.
 Tomorrow we will cut l the picture frame boards and then we will begin to sand and stain each board prior to final installation. If we can get it all the boards cut and sanded and stained by the end of the day tomorrow then we will be making progress!

Wednesday, September 24, 2025

Deck Day 22

The day started off with a bang...almost. we woke up to discover that the king palm on our back porch lost a frond which crashed to the ground. No big deal except it almost took out our table on the deck. We looked up and saw a giant seed pod on the palm hanging directly over the glass table. Time to move the table and chairs and saw that thing down.
 Now the palm looks nice and clean! 
 next step was to go out to the front porch and finish installing the fascia and touching up the last minute corners. It's looking good!
 today is the first day we officially started working on the final deck surface.  We spent some time dragging the deck wood out of the backyard to the front yard and sorting it on the deck itself. We looked at both sides of each board and selected the ones we wanted to use is field boards. We laid them out on the deck and took the remaining three or four boards back to the backyard.
 in the photo above, you'll notice a board is missing. That's because we selected this board to be the first one we would prototype with. 

We cut two feet off the board using the new blade I bought for the miter saw. The blade is an ultra finish blade with 60t and designed to be used with cutting hardwood. Nice clean cut.

The next step was to cut a 45° angle in the board. This was our first attempt at creating what will eventually become the picture frame corners. Unfortunately, the 10-in saw blade on the miter saw is too small to cut diagonally across the 5 and 1/2-in boards. The good news was I bought an ultra finish blade for the circular saw but the bad news was I bought the wrong size so back to Home Depot I went

After I returned the 7 1/4 inch blade, I purchased the same type but in the 6 1/2 in size that my saw uses, I also picked up an 1/8 inch round router bit. A guy we met at the lumber store recommended we use the bit to round off the edges of the field boards where they meet the picture frame boards...to give a nice final touch. 
I had a couple larger router bits that I tested out out but the shape looked funny. The 1/8 inch version I bought was perfect. 

After that, I sanded the board with 220 grit paper and then Michelle painted the wax end on the cut as directed by the lumber yard. Finally we did a quick wipe on and off with the penofin wood sealer we plan to use. See below for the result.
 basically be practiced everything we will need to eventually do to every other board in our inventory. See below for what the processed board looks like next to the other boards.
 The photo below is of the untreated side of the same board so you can tell the difference in color.
 Tomorrow we're going to finalize the final length of the field boards for the deck and start sawing wood!

Monday, September 22, 2025

Deck Day 21

I had a little bit of work to do related to an upcoming presentation I'll be giving on the wellness board goal so that meant I only got half a day of work in.

Michelle and I started installing the fascia today. We installed the first board which screws directly to the joists. We then installed the brackets that we created. After that we began to install the individual boards. We figured it was best to work from the top down. 
I count or sunk the screw holes and left the corners unpainted with the idea being that I will come back later with some wood putty and fill everything in and sand it down before his final touch-ups.

When we got to the third row, we realized I cut the board about 5 inches too short. There's no way I'm going to get this far and leave a 5-inch gap near the staircase so we put everything on hold as I drove to Home Depot to buy another board. I cut it, Michelle painted it, and will install it tomorrow.

In the meantime, I installed one of the deck lights next to the steps. We knew where we wanted that one located from a previous experiment. I forgot where the second light was supposed to go so I taped it to the deck and waited for the sun to go down before we made the final decision on where it should be located.
After the sun went down we shifted the center light forward and added a third light on the end. 
we will make the final decision tomorrow.