Sunday, September 7, 2025

Deck Day 14

Today wasn't too glamorous. We went to Home Depot to purchase some materials for the insulation of an electrical outlet and low voltage lighting on the deck. I bought PVC tubing, wiring, and outlets.

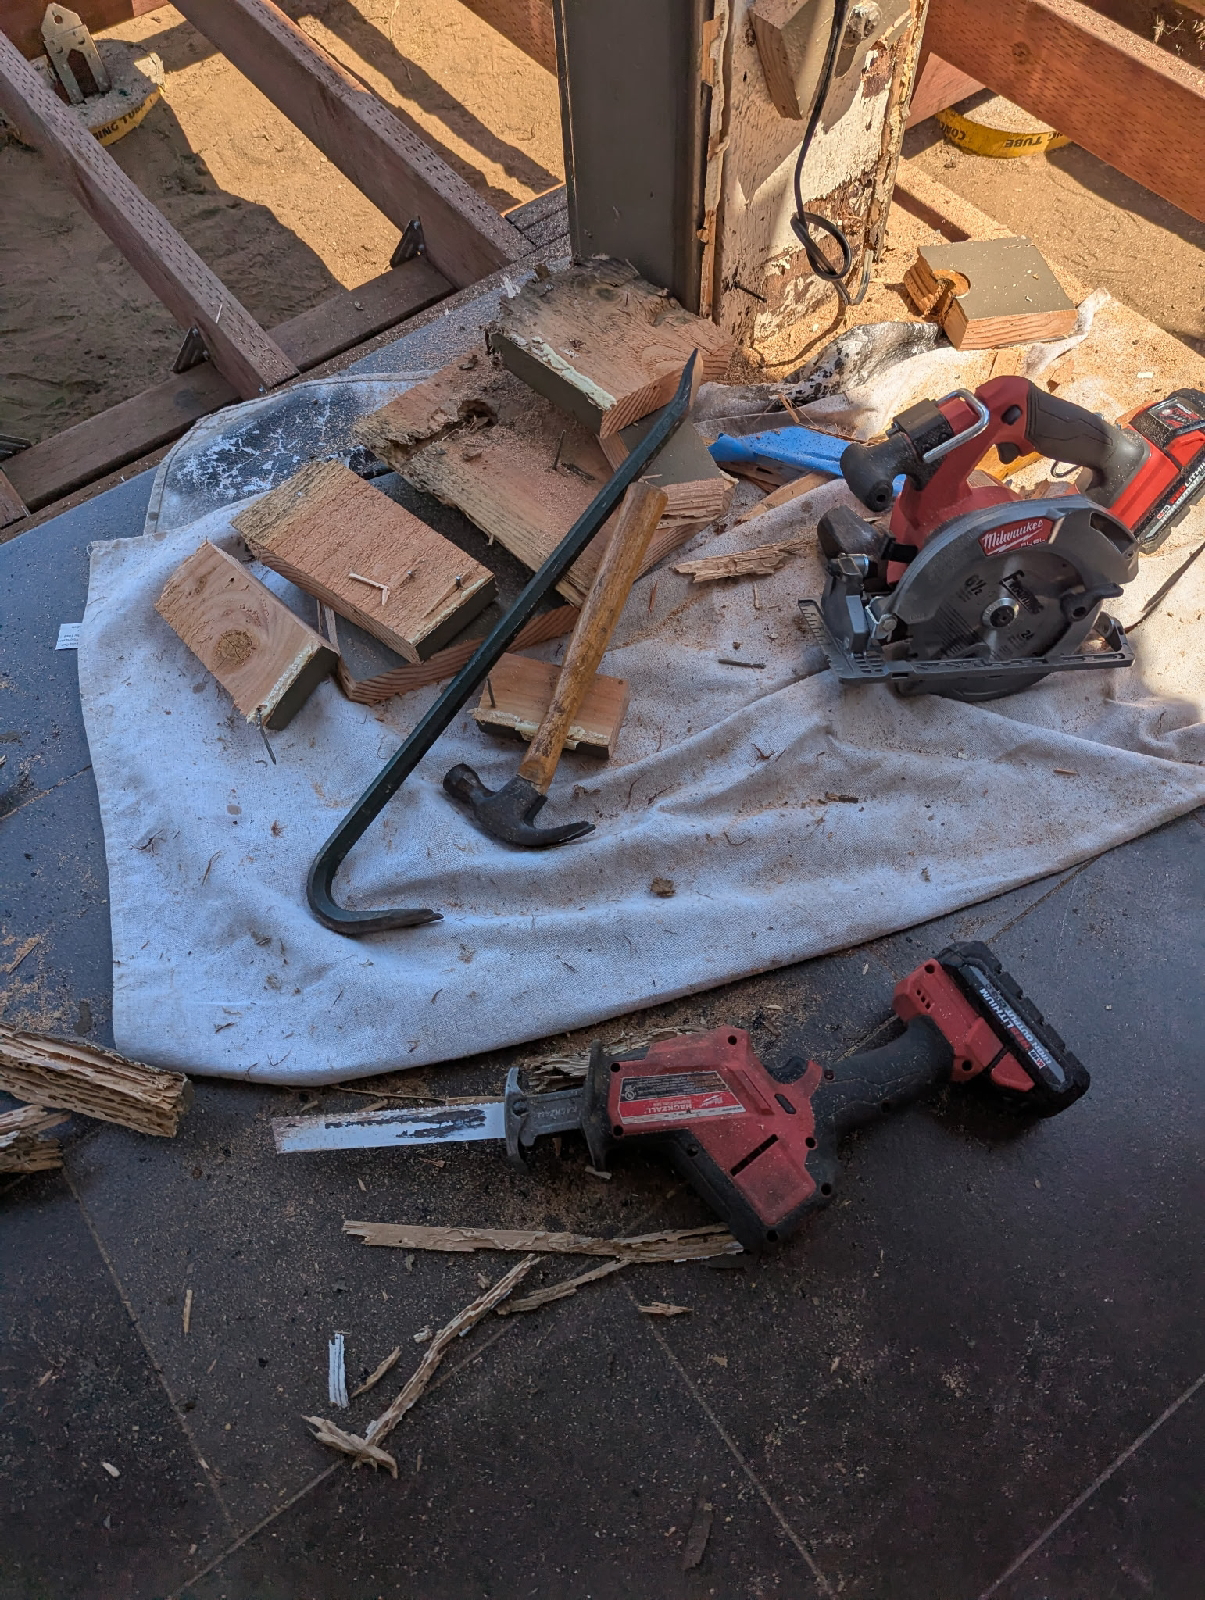
We did some demolition work as well. I had to rip some of the decorative wood off of the post on the porch to see what was behind it. There was a lot of termite damage. 
I also removed some of the low voltage wiring that was installed over 25 years ago. We're going to replace it with a new setup that helps light our new porch and surrounding areas. We hope to go deck wood shopping tomorrow and maybe complete the electrical portion of the project early next week.
Taking the facia wood off the post was harder than I thought. I ended up using a circular saw to make multiple horizontal cuts at the depth of the coverwood itself so I can pry it off the post . I also had to use a sawzall to cut through some nails. I broke a hammer handle during the project.
Michelle is shopping for new low voltage light fixtures.

Saturday, September 6, 2025

Deck Day 13

We reached a milestone in this project today. Michelle and I finished the construction of the substructure for the deck. In other words, all of the beams and joists are installed and leveled. It took a lot of screws and measuring to make it happen but in the end this thing is going to be bulletproof.
 Wonder why we installed the additional boxing along the edges? It has to do with the picture frame design we keep talking about. See below for a photo of someone else's deck that has a picture frame design.
Notice how all the boards are running one way with a border around them. The extra boxing on the sides was necessary to support this border.

Tomorrow I plan on installing an electrical outlet on the far side of the deck and install some low voltage wiring around the substructure for some lights I plan to put in later.

On Monday we'll go shopping for the final hardwood deck surface.

Friday, September 5, 2025

Deck Day 12.5

Deck Day 12 was yesterday, but we only put about 4 hours of work in today so I'll call it 12.5.

We used the brackets to temporarily install each joist in its final position.
 After I figured out all of the spacing, I used the level and some string to verify the joists were aligned correctly.
 I've been checking the level of the project throughout the entire process so at this point everything was pretty much good to go. There were a few joists near the porch that needed to be raised by a 16th of an inch and the beam and joist along the side of the patio needed to be lowered by an eighth of an inch. The edges matching up to the patio are very important because we want there to be a perfect connection between the tile and the final deck wood.
We ended up chopping up a few spacers to raise a couple of the joists and then used an electric planer to take 1/16 of an inch off of another one. I can't remember where I got the planer from (either I bought it a long time ago or my dad let me borrow it) but it really did the trick in a short amount of time. Going to build the deck? Buy one of them!

Thursday, September 4, 2025

Deck Day 12

The key difference between yesterday and today was the type of work. I didn't touch a saw once and my step counter had only half the steps that I had yesterday. This is because I spent the entire day on my hands and knees in the front yard and rarely walked to the backyard where are the chop saw was.

I started off by permanently installing the back beam. You can see the metal feet that the post stand on. The back end is totally bulletproof and will not be bothered by water in the future! 
 The remainder of the day was spent putting together the blocked joists on the sides of the deck. The block design is necessary to support the picture frame deck design we have in mind. Each block was put together with two 4-in timber screws. The job basically involved lining up the joists and making sure the blocks were level with the top, then clamping the joists together and pre-drilling holes through the joist and blocks. We would then come back with an impact hammer and install the timber screws. These things are bulletproof!
 if you look carefully, you'll notice an additional joist that is attached to the blocking structure. This is used to support the wood that will be laid perpendicular to the picture frame design. This is called sistering joist and it involves driving large timber screws through both joists at 4-in intervals.
Along the side of the house, we installed one of the center joists. It's not permanently installed, only the bracket that holds it in place are there and we can easily remove it. 
 We plan to do this to the remaining joists tomorrow. From there, we'll start drawing string across the joists to find the high and low points and either plain down or shimmy up each joist individually. This type of work is necessary to make sure the final deck surface is completely flat. 

Michelle had access to our tub of screws, bolts and brackets and would grab the necessary items for me as I was installing them.
 Having two people definitely made it easier!

Wednesday, September 3, 2025

Deck Day 11

I spent the day sawing wood. I cut all of the joists, three beam joists, and dozens of blocks in different sizes. At this point, there's no more cutting for the substructure. I'm ready to assemble and then start spacing out the final deck wood.
I also sistered my first joist. I did it again as a prototype, this one was a one-off because I had to build a notch in it to go around a drain pipe. The timber screws I am using for this task are burly and require an impact wrench to install.
The small blocks will be used to build a blocking structure along the edges for our picture frame design. I made a prototype of what the blocking might look like. This was mainly for the purpose of figuring out what type of screw I wanted to hold things together with. I went with the hex head. 
There are three areas that will have a locking structure and because of the one-off design of the deck, each area needed a different size block.

Michelle sat in the backyard painting the blocks with a wood sealant. The wood is pressure treated to resist rot and water intrusion, but once you make a cut, you have to retreat the ends.

On a side note, I didn't like the way the last beam on the south side of the patio sat on the ground. I did a test with a hose to see how water would drain and I noticed there was some minor pooling near the concrete footing. I decided to take the small beam apart, and use a different style bracket that lifts the wooden post 1 in off the ground and onto a small metal foot.

If I was to build the deck again, I would probably do that for every post but the other posts don't have drainage problems so it shouldn't be a big deal. I decided to go on the safe side, because once I put this thing together I don't plan on taking it apart again.

Monday, September 1, 2025

Deck Day 10

The second Home Depot delivery arrived today. We ordered 18 2x6 pieces of wood in different sizes for use with constructing the joists. This should be enough wood to construct all of the joists, the end joists, and some of the blocking required for the construction of the sub deck. We also ordered a variety of brackets and screws for use with putting things together. 

Oliver and Henry from across the street helped me move the wood into the backyard. From there I cut them down to manageable sizes and laid them out front to see how things might look. I still have some work to do when it comes to final sizing but where we are heading in the right direction.
Tonight we laid the joists down on their sides and put them together to make and unofficial deck to sit on. It was our first time imagining what the space might look like. We burned some firewood in a solo stove and watched the sunset while taking pictures of the flag. Happy Labor Day!

Wednesday, August 27, 2025

Deck Day 9

It doesn't look like much has changed but today represented a milestone. Michelle and I spent the morning permanently installing the posts and beams with over 200 screws. The base is rock solid.
 part of this process involved using some basic trigonometry to verify all three beams were lined up correctly. I use the 3x4x5 method to verify right angles.
I continue to work on verifying the soil is graded so that in the event of a rain, there will be a good flow towards the west and no pooling. That involved removing two more wheelbarrows of dirt. I think I'm up to 18 now. I also built a small brick "mesa" around the drain. I'm not sure if that will help with drainage or not but I have few dozen extra bricks in the backyard so I figured why not put them to use.
 I watered down the dirt to repress the dust and use this as an opportunity to hose off the plant. Diesel came out to check things out once everything was cleaned up.
Next step, purchasing joists and get immersed into the art of framing.

Monday, August 25, 2025

Deck Day 8

Today's work involved two separate runs to home Depot to buy brackets. I wasn't really sure how to attach the posts to the beams. Because each post is a different size, I ended up having to use one of three methods. The best method is using a bracket specifically designed for the task. That worked for the longer posts. Three of the posts were shorter but still long enough to use another kind of bracket so I bought some of those. Three other legs are so short that you can't use a bracket so I bought giant wood screws and plan on screwing posts permanently into the beam itself so it becomes one solid unit. 

I finished up creating all of the posts from the work started yesterday and had to recut a few to get everything lined up with the porch. The goal is to have the final deck would be perfectly aligned with the surface of the porch. I think I'm in the ballpark.

I loosely put the substructure together including the brackets and double-checked all of the measurements and levels to make sure we're good to go.

Finally I unassembled the structure, labeled each post, and then Michelle helped me paint the cut ends so they'll be resealed from the elements. We need to apply two or three coats of the sealant before we permanently put the deck together.

Diesel was keeping an eye on me today.


Sunday, August 24, 2025

Deck Day 7

Today's work was pretty quick. Oliver from across the street came over and we ended up cutting the beams and posts. 

We did a little math to figure out how long each beam had to be in order to provide support for the entire structure while providing space for the fascia and a 1/4-in lip on the final Deck surface. We ended up with 123" long beams. So we cut three of those and a shorter one for the back. 

The next step was to measure and cut posts for each concrete footing. This was a little time consuming because each post was a different length. We measured and cut one post that allowed the final deck surface to be at the string we measured out then cut another post to allow the beam to sit level. It was nice having Oliver around because he did a lot of the cutting and helping to eyeball all of the measurements while doing the math.

Jack double checked the work to verify everything was to code.