Saturday, September 13, 2025

Deck Day 17

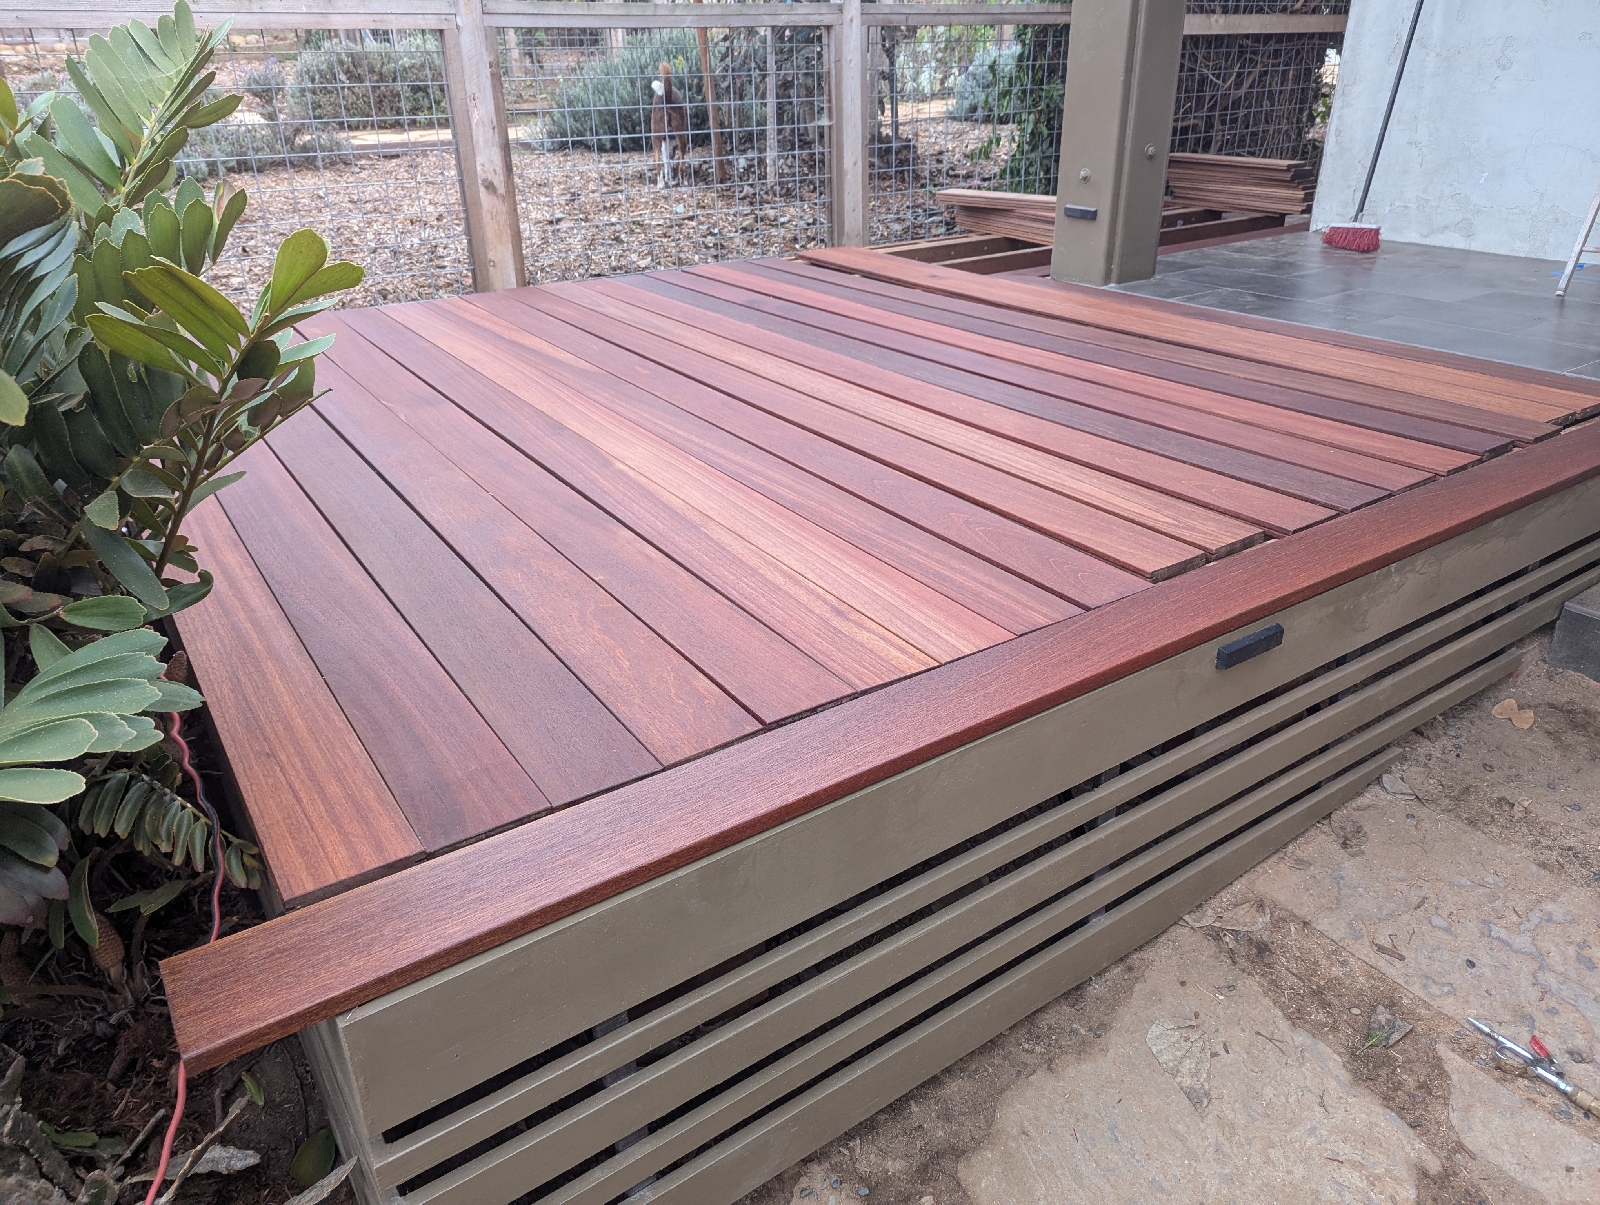
Looks like the board we need to replace isn't a standard size. No problem because we have the tools! 
So we bought a standard size 2x10 board and cut it down from 8 ft to 51 in. We then ran it through the table saw to reduce its width down to 7 and 3/4 in. Finally we use the new router to put a bullnose on both sides. Now it's ready to be painted.
 Michelle has been in the back painting boards all day. Today she put the first coat of paint on the board she put primer on yesterday. Will primer the board I just cut later today or early tomorrow.

Friday, September 12, 2025

Deck Day 16

I did some sanding today. I sanded down and prepped the wood on the front porch to being painted. While doing that, I found another facial board on a beam that had a lot of termite damage. I decided to remove it and that proved to be more difficult than I thought.
After a bunch of hammering with a pry bar, and termite carnage everywhere, I finally got the thing off. Tomorrow I'll go by a replacement board.
I also got to play with a new tool today. I bought a router so I could put a bullnose bevel on the decorative boards on the front porch. The guy at the lumber yard told me the deck boards would look a lot better if I put a 1/8 bullnose on the horizontal boards when they meet up to the vertical ones. I determined I could pay someone to put the bullnose on the boards but in the grander scheme of things, it might be cheaper for me to buy the tool than do it myself.

Turns out you can do a lot of cool things with a router. I carved a channel into the back side of one of the boards going on the post and plan to use it to hide the low voltage wire that will travel up the post to a couple of lights from the conduit I installed earlier. See below for the bullnose I made as well as the notch.

Before all of that, I took a trip to Home Depot to purchase the wood for the fascia. I also purchased some brackets to support the fascia and bought some new paint that matches the existing trim on our house.

Once I got home, I sanded down the boards and Michelle painted primer on all of them. They look pretty good!
I ended the day enjoying the view on our back patio.

Tuesday, September 9, 2025

Deck Day 15

Today was a day spent on electrical work. I tapped into a circuit for the front office space of our house for use with an outdoor electrical outlet that I will install on the deck.  I pulled wire under the house and out one of the vents on the side of the house.
 I then ran conduit down one of the joists and left the wires spooled at the end. I need to install the rim joist before I can place the electrical outlet.
While I was at it, I pulled low voltage wiring for use with deck lights and front yard lights we plan to install later.
I pulled wire to the back fence where we planned to store firewood so that we can have some light back there in case we're looking through stuff we planned to store there.
Finally, I use some paint stripper to try to clean up one of the bolts on the post that I removed yesterday. I want to unscrew the nut and replace it as decoration once I reinstall the wood board but I couldn't get it off because of the years of paint on it.
After removing the paint, I discovered that someone must have bashed the threads in with a hammer 25 or 30 years ago. That was what was keeping the nut from coming off. I pulled out a file and tried to file down the threads but no use. 
Tomorrow I'll have to pull out the Dremel and cut the end of the bolt off to see if that works.


Sunday, September 7, 2025

Deck Day 14

Today wasn't too glamorous. We went to Home Depot to purchase some materials for the insulation of an electrical outlet and low voltage lighting on the deck. I bought PVC tubing, wiring, and outlets.

We did some demolition work as well. I had to rip some of the decorative wood off of the post on the porch to see what was behind it. There was a lot of termite damage. 
I also removed some of the low voltage wiring that was installed over 25 years ago. We're going to replace it with a new setup that helps light our new porch and surrounding areas. We hope to go deck wood shopping tomorrow and maybe complete the electrical portion of the project early next week.
Taking the facia wood off the post was harder than I thought. I ended up using a circular saw to make multiple horizontal cuts at the depth of the coverwood itself so I can pry it off the post . I also had to use a sawzall to cut through some nails. I broke a hammer handle during the project.
Michelle is shopping for new low voltage light fixtures.

Saturday, September 6, 2025

Deck Day 13

We reached a milestone in this project today. Michelle and I finished the construction of the substructure for the deck. In other words, all of the beams and joists are installed and leveled. It took a lot of screws and measuring to make it happen but in the end this thing is going to be bulletproof.
 Wonder why we installed the additional boxing along the edges? It has to do with the picture frame design we keep talking about. See below for a photo of someone else's deck that has a picture frame design.
Notice how all the boards are running one way with a border around them. The extra boxing on the sides was necessary to support this border.

Tomorrow I plan on installing an electrical outlet on the far side of the deck and install some low voltage wiring around the substructure for some lights I plan to put in later.

On Monday we'll go shopping for the final hardwood deck surface.

Friday, September 5, 2025

Deck Day 12.5

Deck Day 12 was yesterday, but we only put about 4 hours of work in today so I'll call it 12.5.

We used the brackets to temporarily install each joist in its final position.
 After I figured out all of the spacing, I used the level and some string to verify the joists were aligned correctly.
 I've been checking the level of the project throughout the entire process so at this point everything was pretty much good to go. There were a few joists near the porch that needed to be raised by a 16th of an inch and the beam and joist along the side of the patio needed to be lowered by an eighth of an inch. The edges matching up to the patio are very important because we want there to be a perfect connection between the tile and the final deck wood.
We ended up chopping up a few spacers to raise a couple of the joists and then used an electric planer to take 1/16 of an inch off of another one. I can't remember where I got the planer from (either I bought it a long time ago or my dad let me borrow it) but it really did the trick in a short amount of time. Going to build the deck? Buy one of them!

Thursday, September 4, 2025

Deck Day 12

The key difference between yesterday and today was the type of work. I didn't touch a saw once and my step counter had only half the steps that I had yesterday. This is because I spent the entire day on my hands and knees in the front yard and rarely walked to the backyard where are the chop saw was.

I started off by permanently installing the back beam. You can see the metal feet that the post stand on. The back end is totally bulletproof and will not be bothered by water in the future! 
 The remainder of the day was spent putting together the blocked joists on the sides of the deck. The block design is necessary to support the picture frame deck design we have in mind. Each block was put together with two 4-in timber screws. The job basically involved lining up the joists and making sure the blocks were level with the top, then clamping the joists together and pre-drilling holes through the joist and blocks. We would then come back with an impact hammer and install the timber screws. These things are bulletproof!
 if you look carefully, you'll notice an additional joist that is attached to the blocking structure. This is used to support the wood that will be laid perpendicular to the picture frame design. This is called sistering joist and it involves driving large timber screws through both joists at 4-in intervals.
Along the side of the house, we installed one of the center joists. It's not permanently installed, only the bracket that holds it in place are there and we can easily remove it. 
 We plan to do this to the remaining joists tomorrow. From there, we'll start drawing string across the joists to find the high and low points and either plain down or shimmy up each joist individually. This type of work is necessary to make sure the final deck surface is completely flat. 

Michelle had access to our tub of screws, bolts and brackets and would grab the necessary items for me as I was installing them.
 Having two people definitely made it easier!

Wednesday, September 3, 2025

Deck Day 11

I spent the day sawing wood. I cut all of the joists, three beam joists, and dozens of blocks in different sizes. At this point, there's no more cutting for the substructure. I'm ready to assemble and then start spacing out the final deck wood.
I also sistered my first joist. I did it again as a prototype, this one was a one-off because I had to build a notch in it to go around a drain pipe. The timber screws I am using for this task are burly and require an impact wrench to install.
The small blocks will be used to build a blocking structure along the edges for our picture frame design. I made a prototype of what the blocking might look like. This was mainly for the purpose of figuring out what type of screw I wanted to hold things together with. I went with the hex head. 
There are three areas that will have a locking structure and because of the one-off design of the deck, each area needed a different size block.

Michelle sat in the backyard painting the blocks with a wood sealant. The wood is pressure treated to resist rot and water intrusion, but once you make a cut, you have to retreat the ends.

On a side note, I didn't like the way the last beam on the south side of the patio sat on the ground. I did a test with a hose to see how water would drain and I noticed there was some minor pooling near the concrete footing. I decided to take the small beam apart, and use a different style bracket that lifts the wooden post 1 in off the ground and onto a small metal foot.

If I was to build the deck again, I would probably do that for every post but the other posts don't have drainage problems so it shouldn't be a big deal. I decided to go on the safe side, because once I put this thing together I don't plan on taking it apart again.