I bought my first mountain bike (Santa Cruz Bronson) in 2017. 1264 miles and tons of fun later I found a new ride. I’m in love with bikes and can’t wait to see where my Pivot Mach 6 takes me.


I bought my first mountain bike (Santa Cruz Bronson) in 2017. 1264 miles and tons of fun later I found a new ride. I’m in love with bikes and can’t wait to see where my Pivot Mach 6 takes me.


Spent some time letting my ankle heal. That included multiple visits to the doctor and some "scooter" time but the good news is I'm back at 95%. See below for my most recent visit to Santa's Village.

I hurt my ankle jumping my bike back in November 2021.

At first I thought it was a bad ankle sprain. Turned out to be a little more, but that is a different story. The bottom line was I had to find something to do to occupy my time for 12 to 14 weeks. I decided to remove the backseat from my truck and replace it with a rack system for storing camping supplies.
The first step was to remove the back seat. I quickly sold it on OfferUp. The next step was to build a frame for the rack to bolt to. I purchased metal bars called Unistrut from Home Depot and used my chop saw to cut them into the appropriate lengths. I designed the system to bolt into the stock mounts used by Ford to mount the original seat. Unistrut comes with an adjustable bolt system to connect pieces together for the purpose of forming various shapes.

The next day I drove the truck to the store and was surprised to learn how loud the engine and exhaust noise was in the cab. Apparently the back seat also served as a sound baffle for noise entering the cab from the back wall of the truck. In addition, the vents in the photo above (which are required for the air conditioning system to work properly when the windows are rolled up) allowed additional sound into the cab. The noise was more than I wanted to listen to on long drives so I decided to install sound deadening material throughout the cab.

Basically this involved removing the front seats, existing carpet, and stock sound mat that came with the truck. Next I installed 1/4" thick rubber sound deadening sheets that cut to fit with a box knife. I covered the entire floor with sheets with a silver backing. I purchased sheets with a black backing for the back wall for aesthetics. Once I completed this task, I reinstalled the original sound mat and carpet. The decrease in sound was incredible!
The next step was to paint the metal frame black and permanently install it in the truck.

I mentioned the floor mounts were designed to bolt into the existing holes for the stock seat. The back mounts were bolted to the cab of the truck using "rivnuts". Rivnuts are basically brass nuts with a base that mushrooms out when installed with a rivnut tool.

Simply drill a hole in the cab, place the rivnut in the hole, then use the rivnut tool to mushroom out the backside. Once complete you have a threaded hole you can screw bolts into.
The sound deadening material really helped muffle the engine and exhaust noise but the black vents in the back were still allowing sound to enter the cab. I was able to confirm this by temporarily taping over the vents with cardboard.

I decided have a vent cover fabricated for the purpose of deadening the sound. I found a student in the engineering program at my school who enjoyed playing with auto-cad software and asked him to design a vent cover for my truck.

He built me two covers made from plastic. They were printed on a 3D printer in his classroom.

Notice how the final version has foam deadening material in it to help absorb more sound. I had the student install the vent covers in the back of the truck. They look and work great!
The next step was to build the benches themselves. I researched the dimensions for military "molle". Molle is a belt/loop system for attaching various items to each other. I designed two rack plates which conformed to the molle pattern. The back bench is below.

The black squares were left where the mounting hardware will attach the rack to the frame. The bottom bench has a slightly different molle pattern.
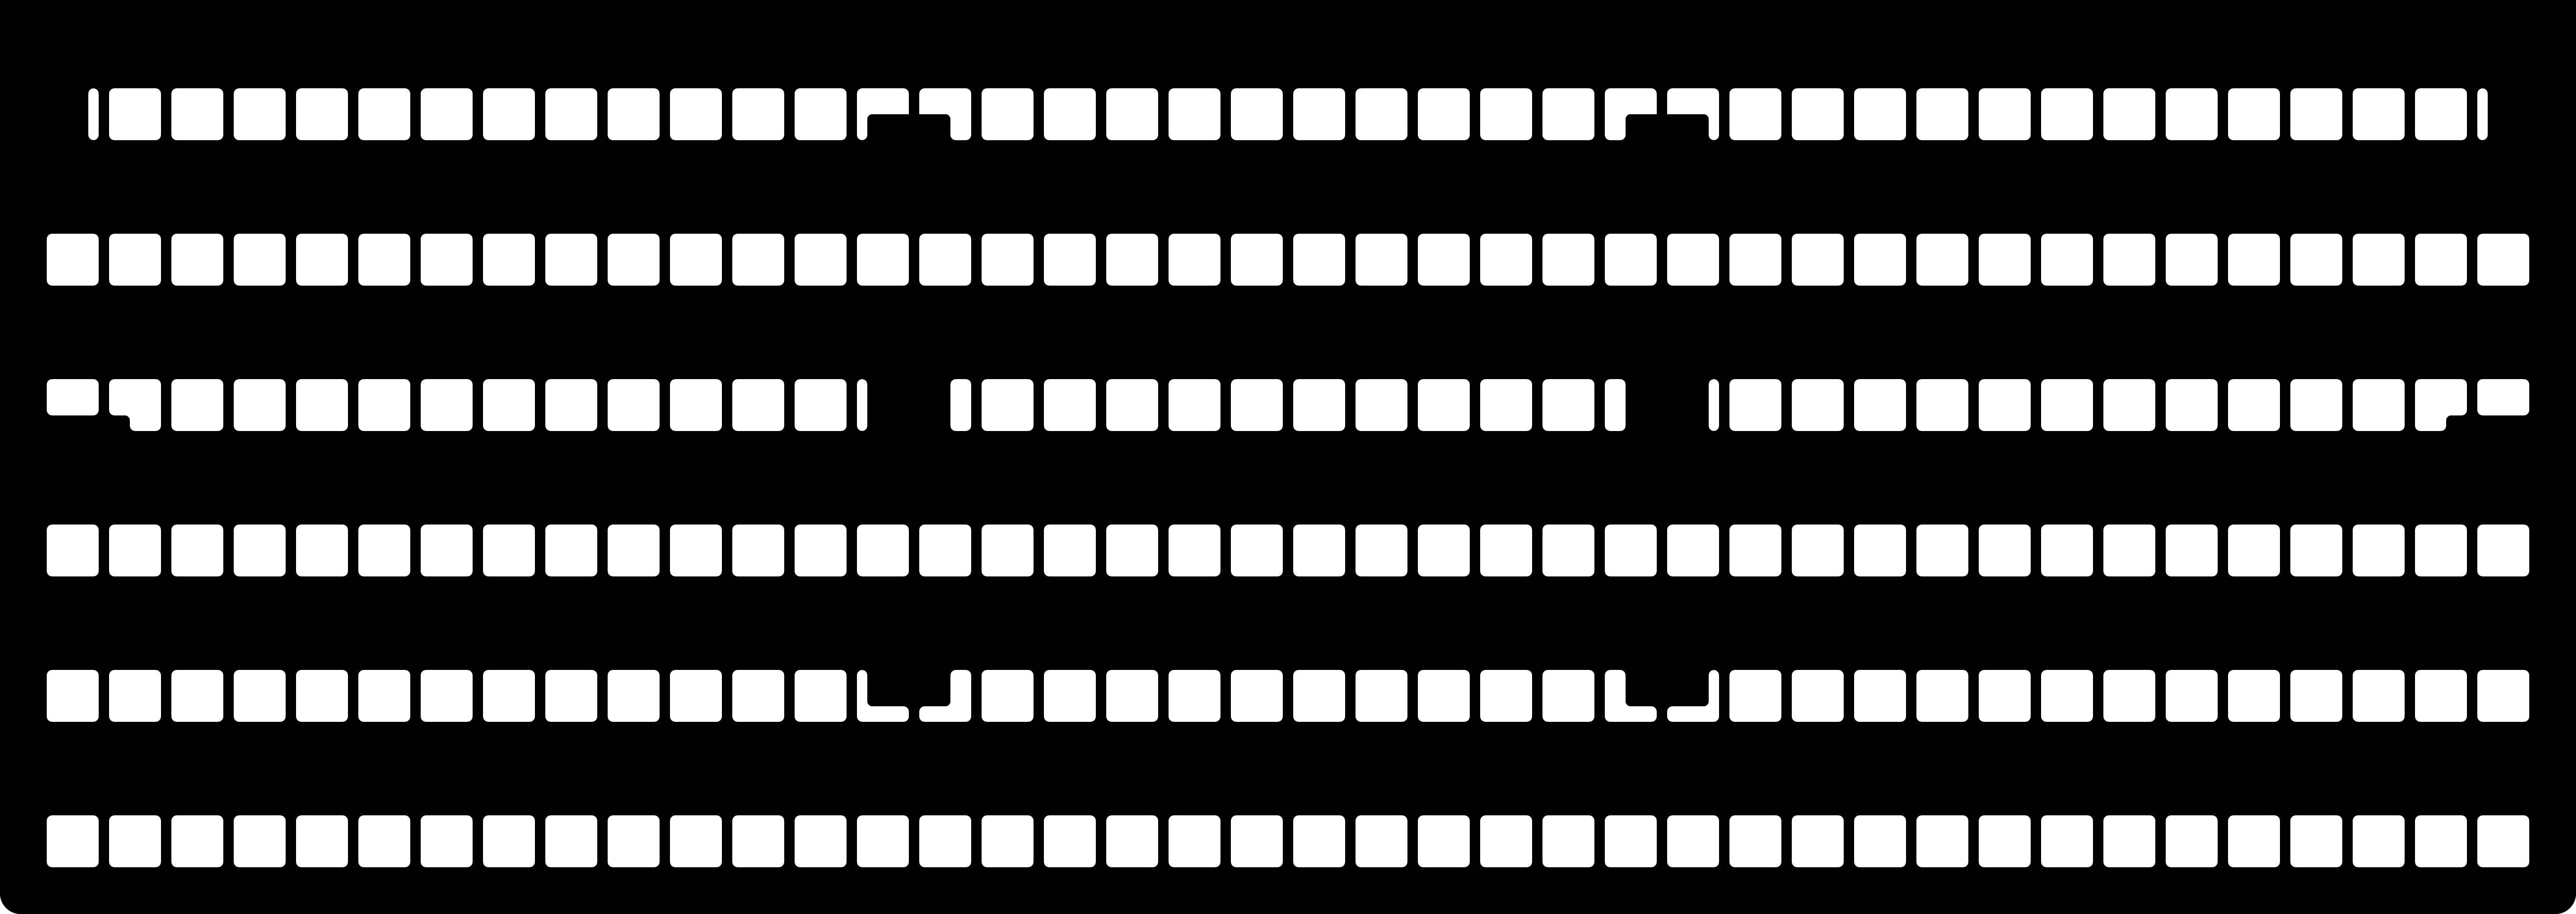
Notice how every other row of holes was removed. This design allows the bottom to hold additional weight. I want to carry a DC refrigerator and possibly a spare tire in the back of the cab.
I purchased two pieces of "starboard" from a local plastics company. Starboard is a plastic material that comes in 4' x 8' sheets. You can use basic wood working tools to cut and mold it. Basically it behaves like plywood but doesn't rot or splinter. Fishing boats have tackle boxes made of starboard.
I partnered with a teacher at a local high school who teaches an industrial technology class. I emailed him my design files and dropped off the starboard sheets at his classroom. He used a giant CNC router to cut the holes in the plastic. See below for the test fit of the back panel.

Notice how I am able to connect a fire extinguisher and various bags to the molle pattern. This provides a lot of flexibility regarding how I store tools and equipment. The final install looks nice.

The entire back of the cab can be loaded with equipment and tools.

The bags next to the fire extinguisher hold flashlights, tie downs, rope, some tools, gloves, and a first aid kit. The space between the bottom panel and the floor of the cab is used to store additional tools, tow straps, jumper cables, and equipment.


The refrigerator straps down on the passenger side of the cab. There is a small access port near the back of the refrigerator for me to run the power cable out of the cab of the truck. Next week I'll connect this cable to the electrical system existing in the camper. Eventually the solar panels on the top of the truck will power the refrigerator 24/7.
I'm happy with how the project turned out. It took longer than I thought but the end product looks good and works well. My foot is all healed up and I'm ready to continue surfing and bike riding.


